Program Definition Program Method: Difference between revisions
No edit summary |
No edit summary |
||
| Line 102: | Line 102: | ||
To edit the program, simply click the ''Program Name'' to open the desired program. | To edit the program, simply click the ''Program Name'' to open the desired program and begin making edits. | ||
[[File:Edit existing program.png|none|thumb|458x458px]] | [[File:Edit existing program.png|none|thumb|458x458px]] | ||
Revision as of 12:55, 18 March 2025
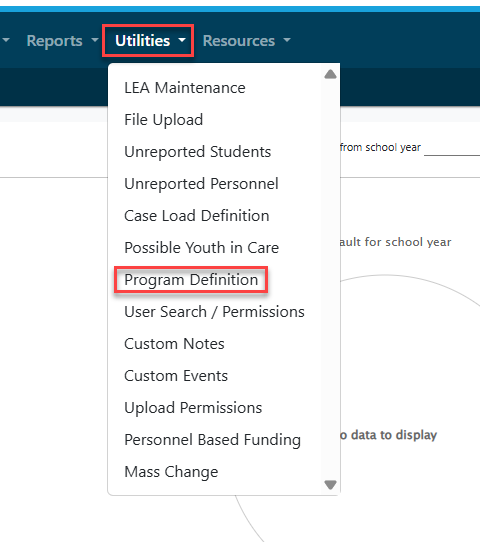
To access the program definition, click the Utilities tab and then click on Program Definition.
NOTE: The Program Method in I-Star Plus is an optional tool. You should only use the program method if you have any Fund Code E, Fund Code X, or out of district students you need to create a bill for. However, students in a cost center must have common educational needs.
Add New
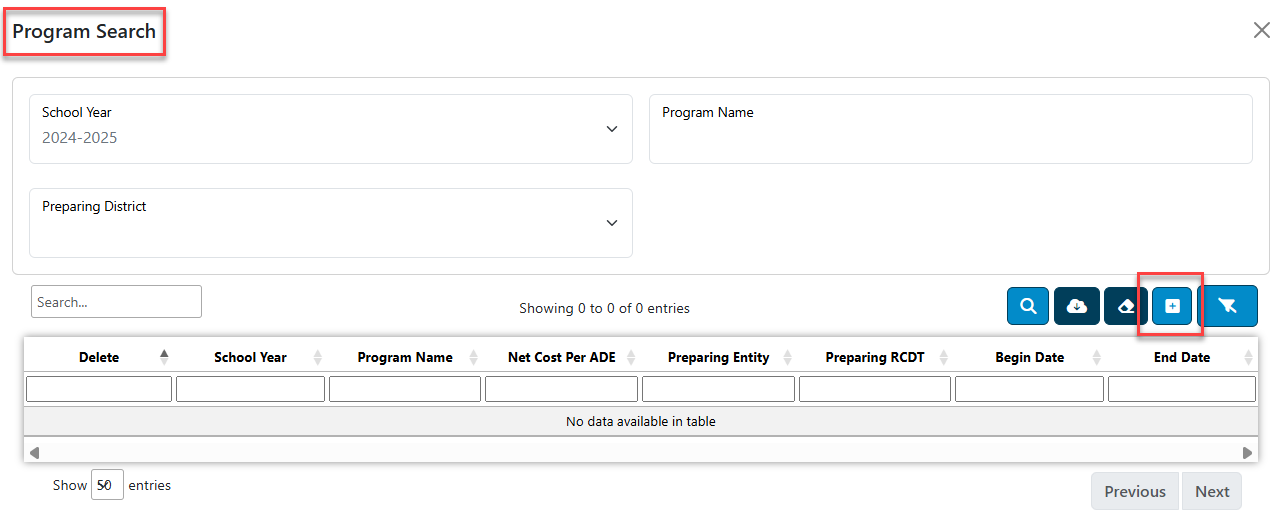
To add a new program, simply click the blue + sign in the Program Search.
Fill in the appropriate information in the "Add Program Definition" box and click save once complete.
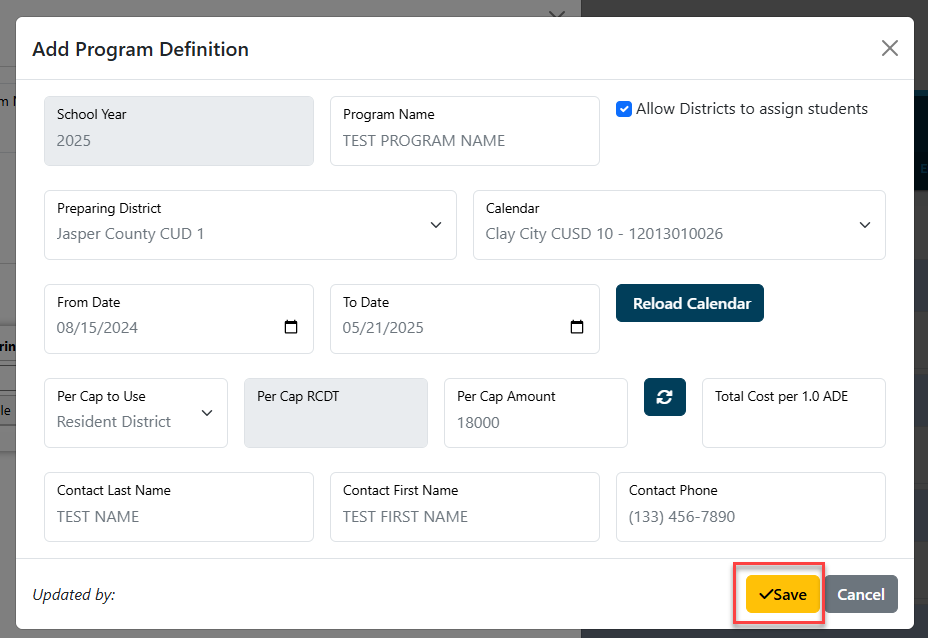
NOTE: The Allow Districts to assign Students check box should be used for cooperative use only.

This will take you to the created Program Definition where you can begin adding personnel to the program.
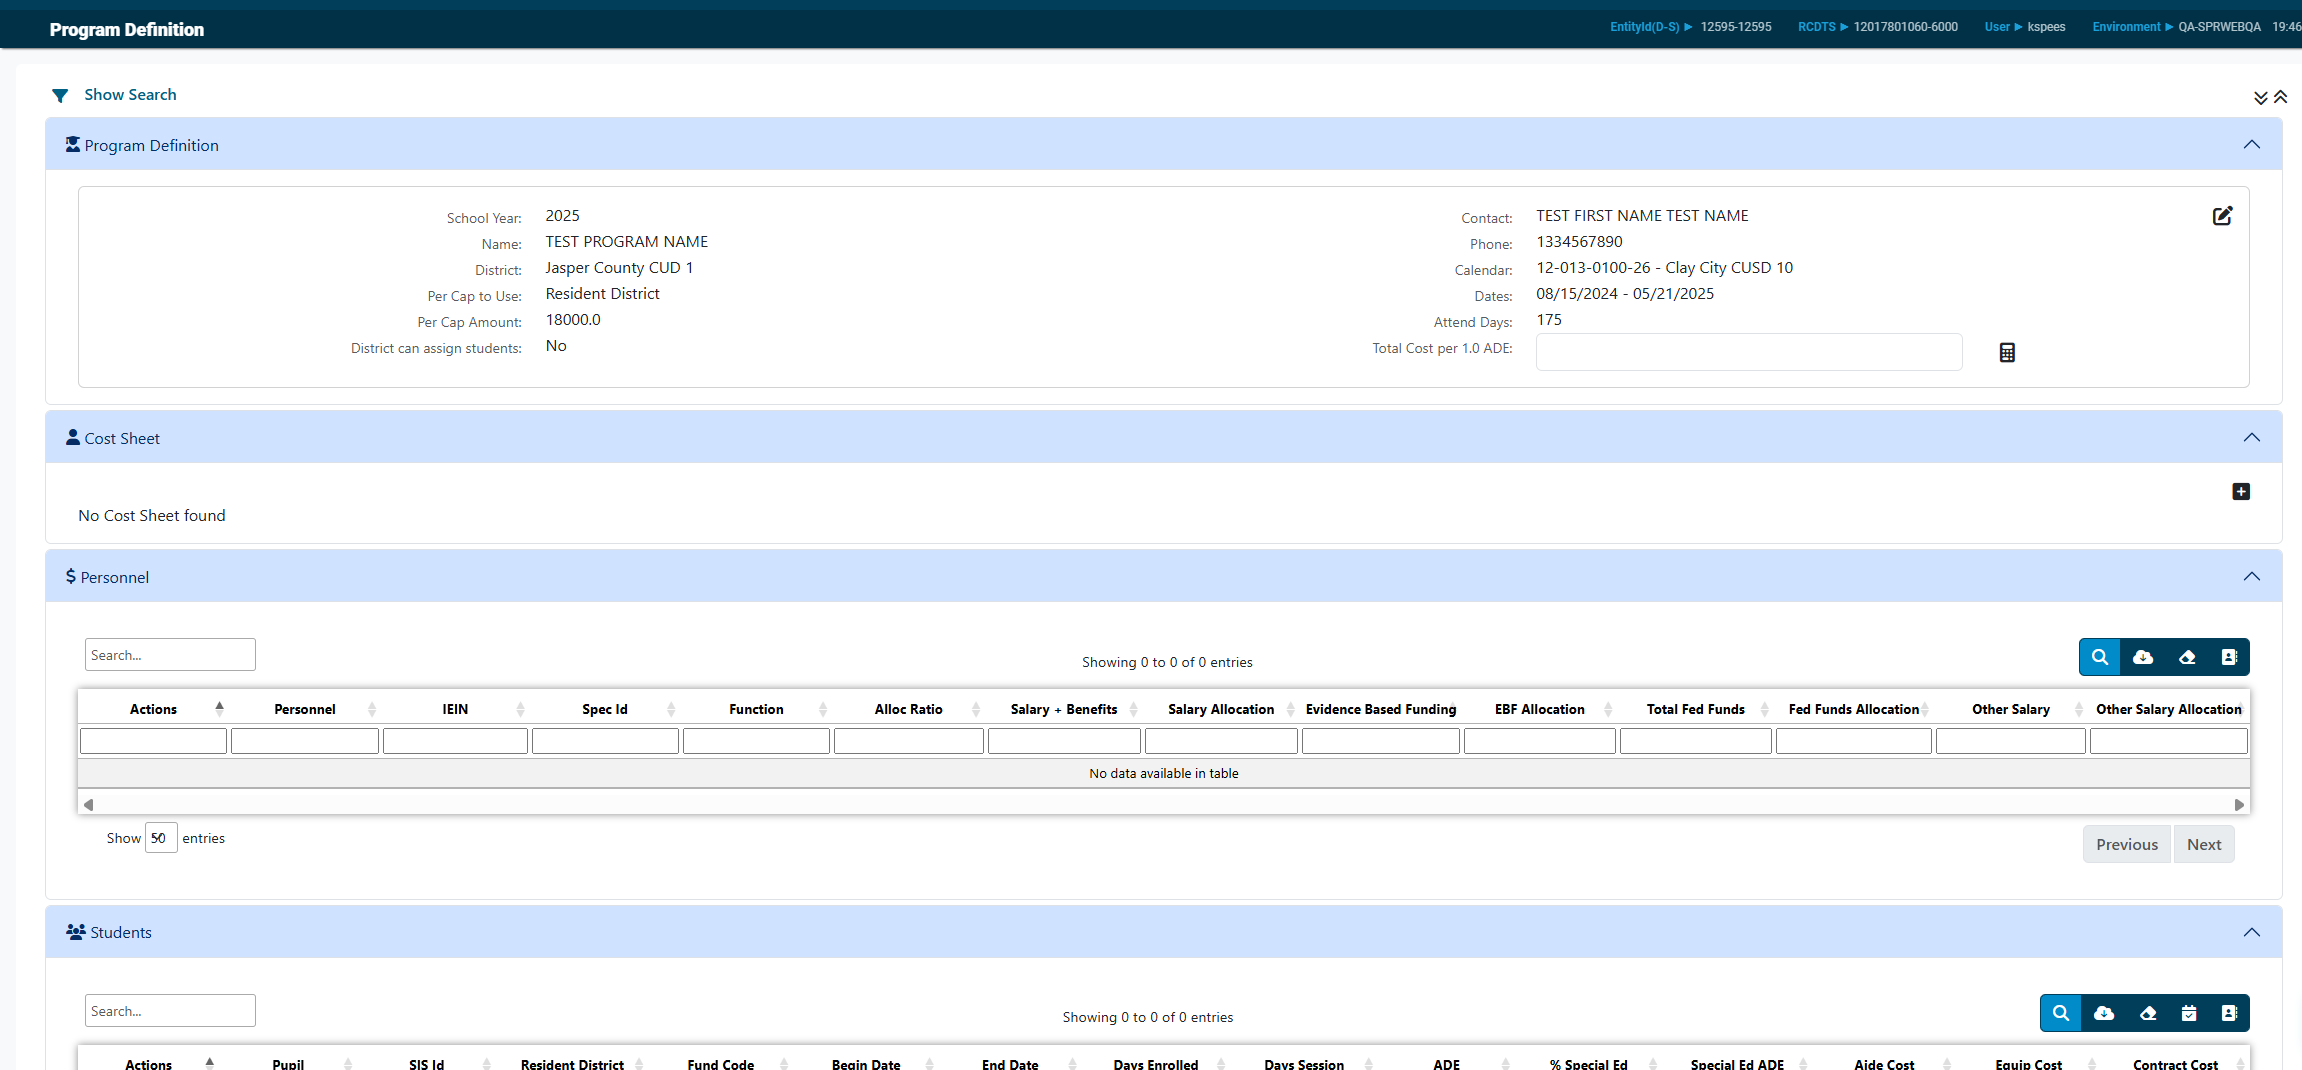
To add personnel, click the far right icon in the Personnel panel.

You can search for personnel by any of the search criteria listed. You can select one at a time by IEIN, First Name, Last Name, Gender and/or District or by multiples by checking the box under the Multi Select column of the personnel you wish to add. When all personnel are checked, click Use Selected.
You will see the list of personnel you have added. To edit the Allocation Ratio in that grid, simply click on the name of the staff member.
You can edit any of the white fields available on this screen.
NOTE: Even though the Function Value is an editable field, the Function Value should not be changed. However, you may edit the Allocation Ratio if needed.
The gray fields are carried over from the individual Personnel Approval Record located in the Salary Information/Offsets section. If the amount in the gray field is incorrect, you can edit it from the personnel approval record.
Click Save when completed.
To add students to the program, click the blue magnifying glass in the student search panel.

Further filter the list of available students to add by using the header columns.

To add a student to the program definition, click on the student and then click on the "select claims" icon.

The student's claim will be viewable in the Students panel.

To add more students, repeat the search directions from above.
To add several students at once, search and filter for students once more and while holding down the Ctrl button on your keyboard, click on all student names that should be added to the program.

The Cost Sheet (5066A) is an editable form. Click the + button in the Cost Sheet panel to add the cost sheet for the selected program.

NOTE: Figures for lines 1-7, 33, 34, and 34a will automatically populate for the cost sheet, but will remain editable if changes need to be made. To enter line 24, click the box for Enter other function.
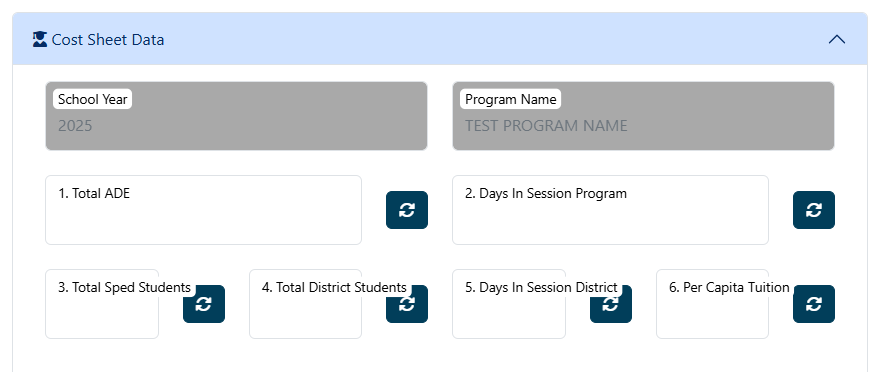

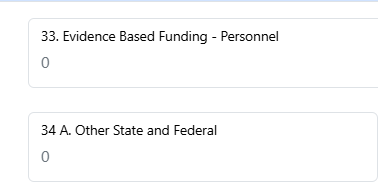
When all the lines that apply to this program have been entered, click the yellow Save button at the bottom to get line 37.
You can return to the Program Search by clicking the Cancel button at the bottom of the screen.
Edit Existing
You can search for an existing program by once again clicking on the Utilities tab and then Program Definition.
Click the blue magnifying glass to populate all available programs.
A list of your programs will appear in the results grid.
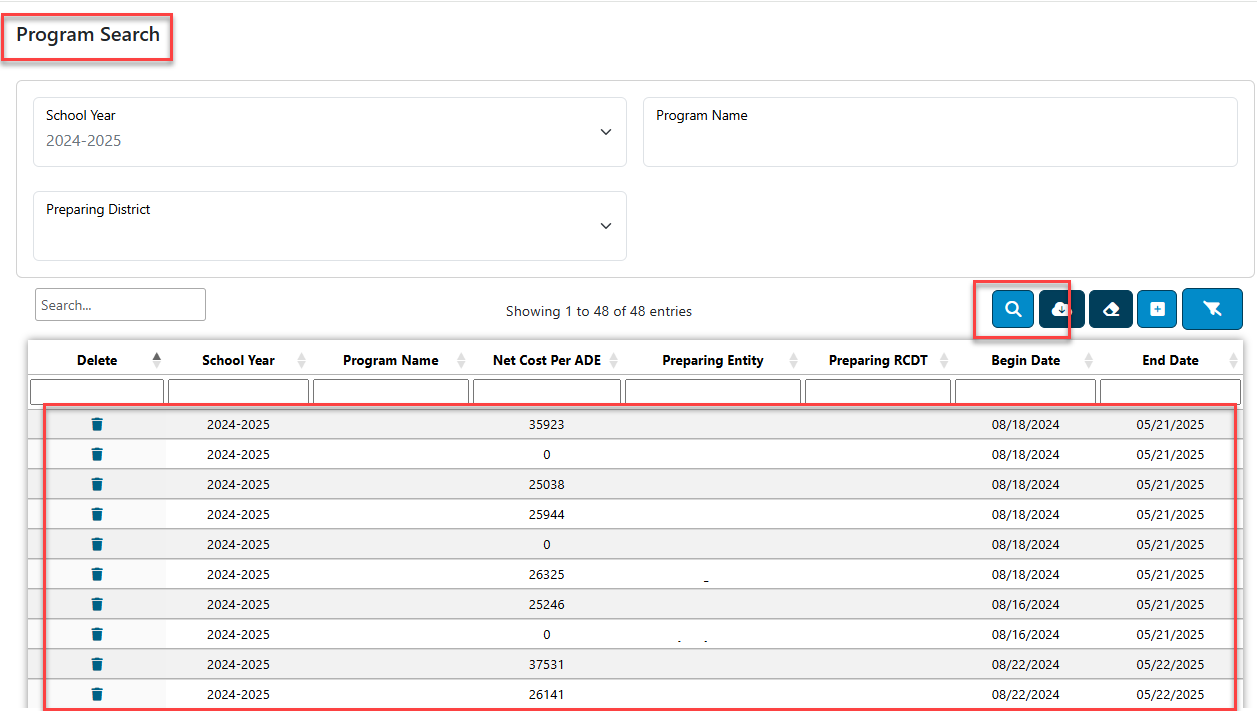
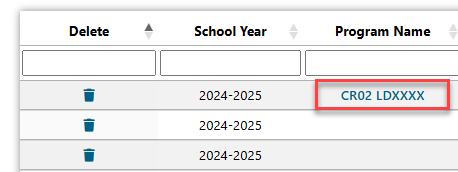
To edit the program, simply click the Program Name to open the desired program and begin making edits.
