Student Analytics: Difference between revisions
No edit summary |
No edit summary |
||
| Line 13: | Line 13: | ||
The initial view of the Student Analytics page is pictured below. | The initial view of the Student Analytics page is pictured below. | ||
[[File:Student analytics main page 1.png|none|thumb|1789x1789px]] | [[File:Student analytics main page 1.png|none|thumb|1789x1789px]] | ||
'''SHOW ELIMINATE SEARCH HEADERS''' | |||
# '''SHOW ELIMINATE SEARCH HEADERS''' | |||
To show and/or eliminate any search headers, click on the funnel icon. | To show and/or eliminate any search headers, click on the funnel icon. | ||
| Line 38: | Line 39: | ||
Once the search filters are finalized, click the blue magnifying glass to see the new student analytics search screen. | Once the search filters are finalized, click the blue magnifying glass to see the new student analytics search screen. | ||
[[File:Search filters11.png|none|thumb]] | [[File:Search filters11.png|none|thumb]] | ||
[[File:New search page.png|none|thumb|1373x1373px]] | [[File:New search page.png|none|thumb|1373x1373px]] | ||
Districts may also change the order of how the headers are displayed from the main search screen. Simply click and drag the column headers to re-order. [[File:Click and drag.png|none|thumb|1314x1314px]]'''2. Create Basic Filters''' | |||
Districts are able to create their own basic filters in I-Star Plus to identify a possible selection of students. For example: a student who is 4 years old and in Grade K requires Early Childhood Educational Environment codes. Once the student turns 5 years old and in Grade K, the educational environment must be changed to reflect school age codes. To identify that select group of students, click into Student Analytics and click on the funnel icon. | |||
[[File:Building search filters.png|none|thumb|484x484px]] | |||
Click on the arrow for Advanced Filters. | |||
[[File:Advanced filters.png|none|thumb|1131x1131px]] | |||
Revision as of 13:37, 14 April 2025
Student Analytics is a more detailed, advanced student search feature in I-Star Plus. Districts are able to:
- Show/Eliminate Search Headers
- Create Basic Filters
- Create Advanced Filters (And/Or Statements)
- Save Filters for Future Use
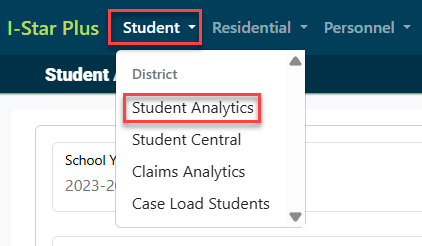
To access the Student Analytic section, click on Student Analytics from the Student dropdown.
The initial view of the Student Analytics page is pictured below.

- SHOW ELIMINATE SEARCH HEADERS
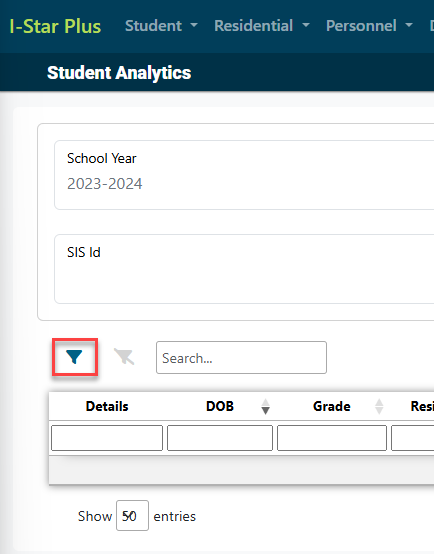
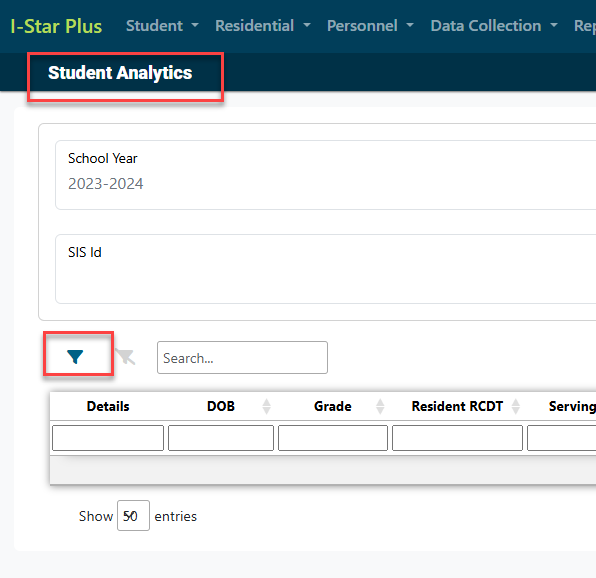
To show and/or eliminate any search headers, click on the funnel icon.
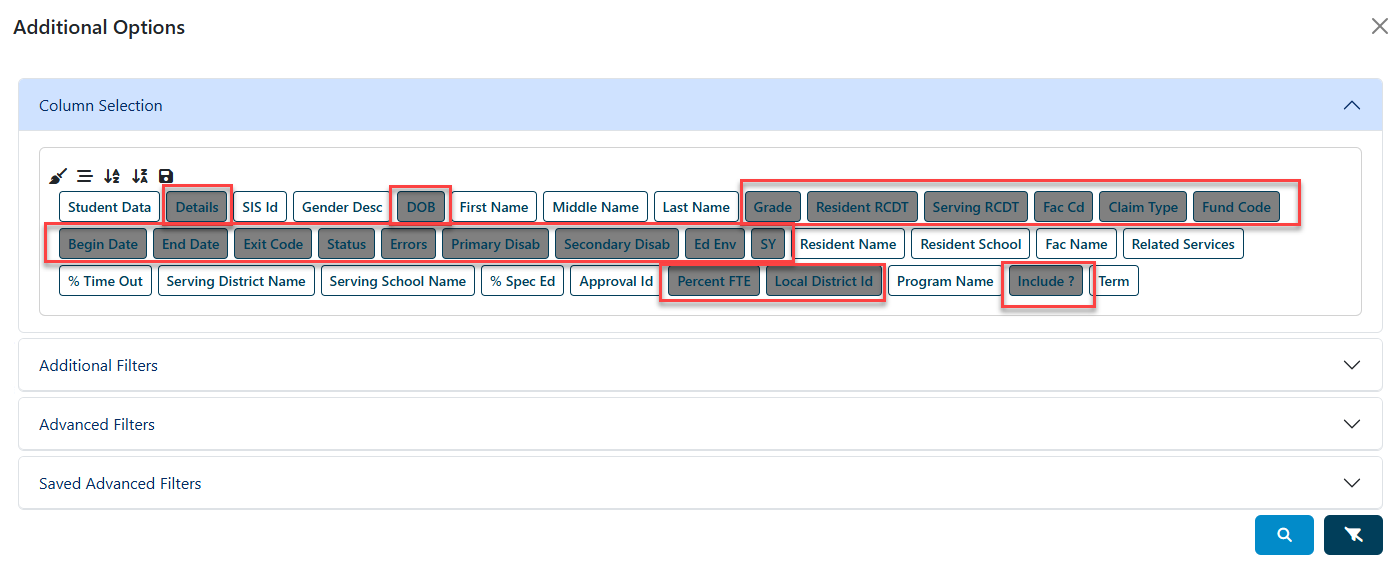
The grey-colored boxes are the default columns that initially appear on the student analytic parent screen. To remove any of the columns, simply click on the grey box.
Once you have de-selected the columns that you do not wish to see, you can then click on any column filters that you want to include.
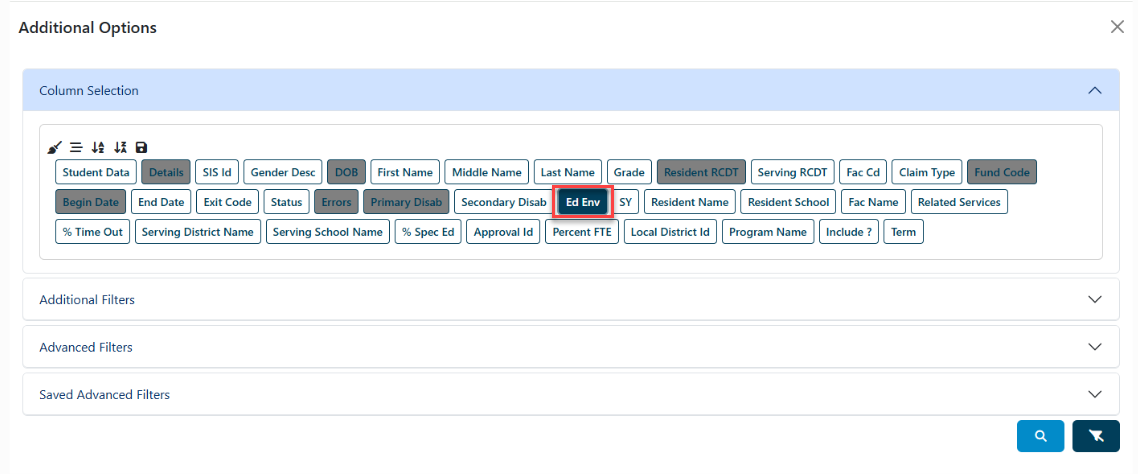
Districts and also change how the columns present the desired information by clicking on the alphabetical sort icons (A-Z or Z-A).
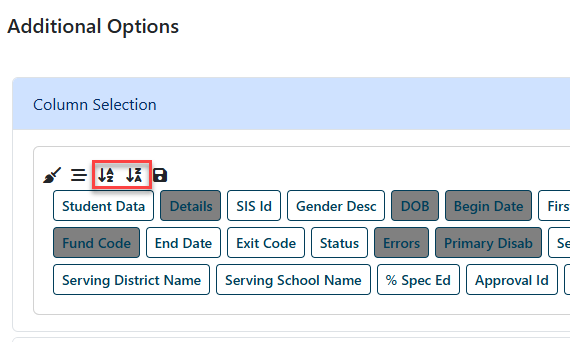
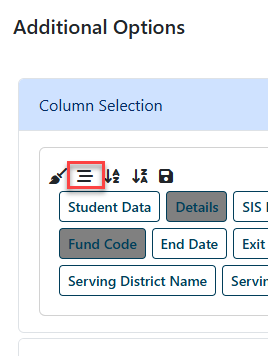
To return to the default view, click the icon pictured below.
Once the search filters are finalized, click the blue magnifying glass to see the new student analytics search screen.


Districts may also change the order of how the headers are displayed from the main search screen. Simply click and drag the column headers to re-order.

2. Create Basic Filters
Districts are able to create their own basic filters in I-Star Plus to identify a possible selection of students. For example: a student who is 4 years old and in Grade K requires Early Childhood Educational Environment codes. Once the student turns 5 years old and in Grade K, the educational environment must be changed to reflect school age codes. To identify that select group of students, click into Student Analytics and click on the funnel icon.
Click on the arrow for Advanced Filters.
