End Add: Difference between revisions
mNo edit summary |
No edit summary |
||
| (3 intermediate revisions by the same user not shown) | |||
| Line 10: | Line 10: | ||
''- Disability Code Change'' | ''- Disability Code Change'' | ||
''- Fund Code Change'' | ''- Fund Code Change''<center></center>Locate the Student dropdown and click on Student Central. | ||
[[File:Studentcentraldraft.png|none|thumb|381x381px]] | |||
Find the student whose approval requires an end/add and click on the record from the left-hand side of the screen. | |||
[[File: | [[File:Dotheendadd.png|none|thumb|529x529px]] | ||
Locate the “Student Approval Data” section and click on the chain link icon to perform the End/Add. | |||
[[File:Chainlink.png|none|thumb|1104x1104px]] | |||
[[File: | Enter the end date and exit code for the student’s first approval record and click ‘Do End/Add”. | ||
[[File:Doendadd.png|none|thumb|777x777px]] | |||
The new approval will automatically begin the day after the previous record’s end date. To edit the end date, click on the “edit” icon to bring up the student approval. | |||
[[File:Editicon.png|none|thumb|944x944px]] | |||
[[File: | |||
Change the new record’s begin date (if needed) and click the “Check Errors” button to update. | |||
[[File:Checkerrorsonendadd.png|none|thumb|723x723px]]Click cancel to return to Student Central. | |||
[[File: | |||
Latest revision as of 07:50, 12 March 2025
NOTE: End/Adds are performed when including, but not limited to, the following:
- Student turning 10 with a disability of N
- Educational Environment Code Change
- Disability Code Change
- Fund Code Change
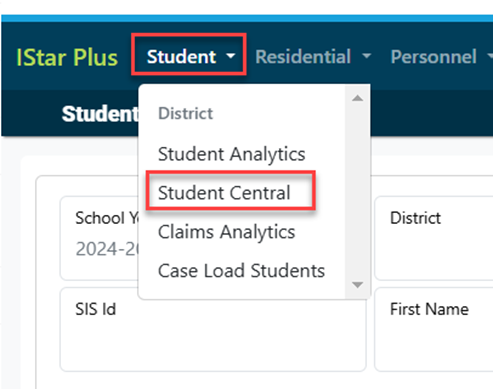
Locate the Student dropdown and click on Student Central.

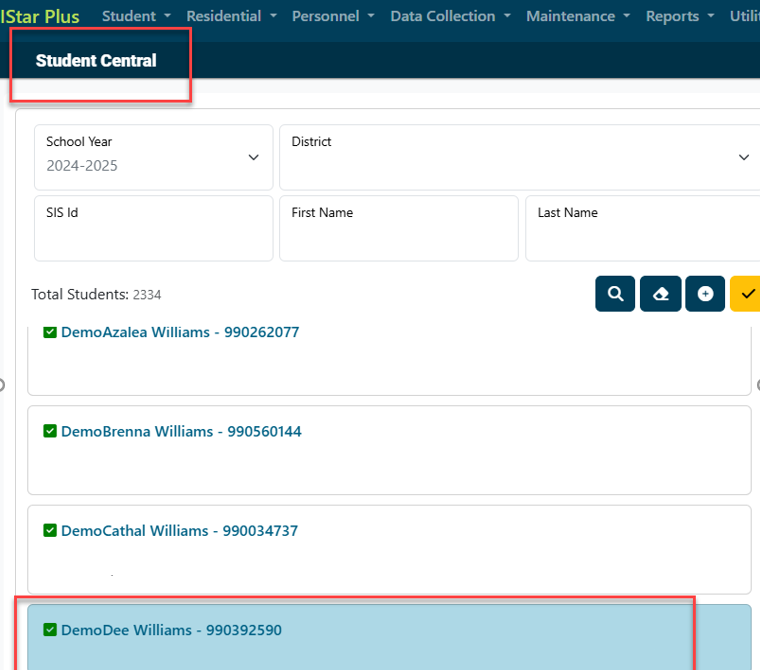
Find the student whose approval requires an end/add and click on the record from the left-hand side of the screen.

Locate the “Student Approval Data” section and click on the chain link icon to perform the End/Add.

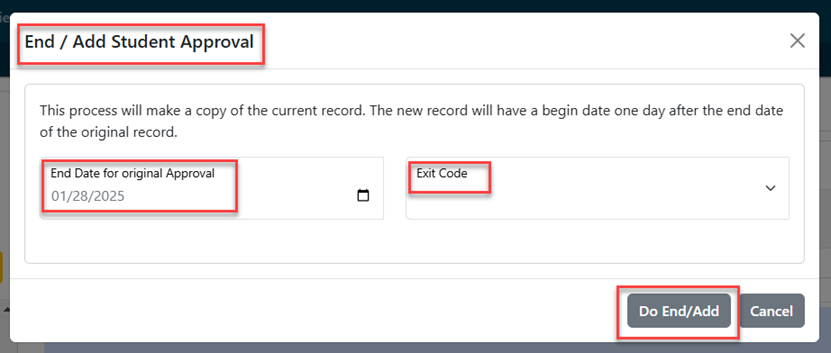
Enter the end date and exit code for the student’s first approval record and click ‘Do End/Add”.

The new approval will automatically begin the day after the previous record’s end date. To edit the end date, click on the “edit” icon to bring up the student approval.

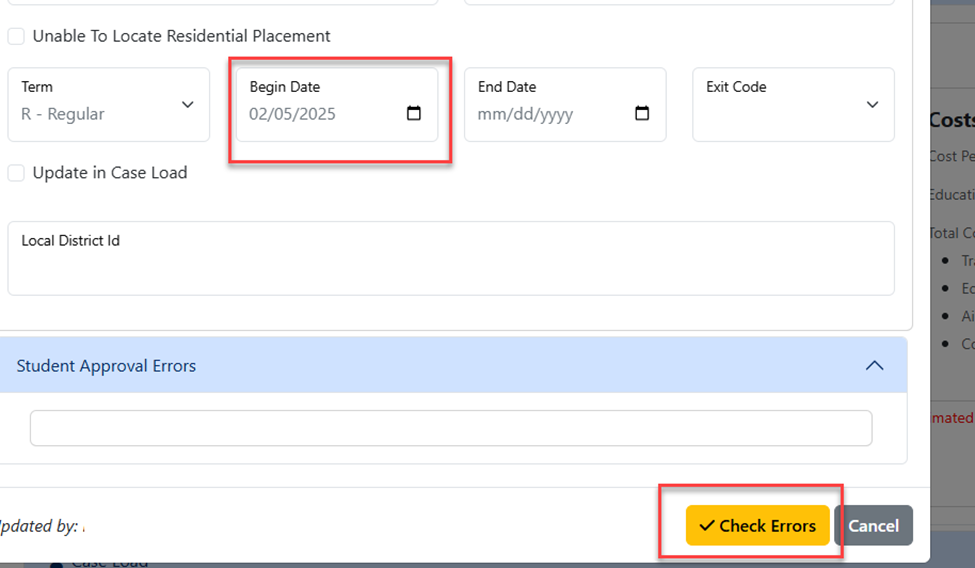
Change the new record’s begin date (if needed) and click the “Check Errors” button to update.

Click cancel to return to Student Central.