Events: Difference between revisions
content |
No edit summary |
||
| (5 intermediate revisions by 2 users not shown) | |||
| Line 1: | Line 1: | ||
<center><small>(Navigate to [[Notes|< Notes]] | <b>[[I-Star Student User Guide]]</b> | [[Transportation|Transportation >]])</small></center> | |||
[[ | |||
To add/edit events, search for the student approval that required edits and scroll to the bottom to view the “Notes / Events” section. Click the + sign to add a new event. | |||
[[File:Notesandevents.png|none|thumb|975x975px]] | |||
Choose an event type from the first dropdown. | |||
[[File:Eventtype.png|none|thumb]] | |||
[[File: | After choosing the note(s) that apply, two text boxes are available as well as event dates and event time dropdowns. Fill out the sections appropriately (if needed) and click save to complete. | ||
[[File:Notesthatapply.png|none|thumb|691x691px]] | |||
[[File: | After saving, the event will be displayed on the Student Approval View. | ||
[[File:Addednewevent.png|none|thumb|975x975px]] | |||
To add multiple events at once, click the + sign in the Events panel and click on all Events that should be added to the student's approval. | |||
[[File:Add multiple events.png|none|thumb|585x585px]] | |||
After selecting the necessary events, click anywhere on the popup box to return to the main edit screen. | |||
Note: When creating multiple events at once, they will be created with the same date/notes. | |||
[[File:Click anywhere and enter the notes.png|none|thumb|692x692px]] | |||
Once finished, click the save button. | |||
To edit an event, click the edit icon. | |||
[[File:Editexistingnote.png|none|thumb|975x975px]]Make the necessary edits and click the Save button once completed. | |||
[[File:Editing an event.png|none|thumb|636x636px]] | |||
After clicking save, I-Star Plus will re-route users back to student central. | |||
[[File: | |||
[[File: | |||
Latest revision as of 13:05, 24 March 2025
To add/edit events, search for the student approval that required edits and scroll to the bottom to view the “Notes / Events” section. Click the + sign to add a new event.

Choose an event type from the first dropdown.
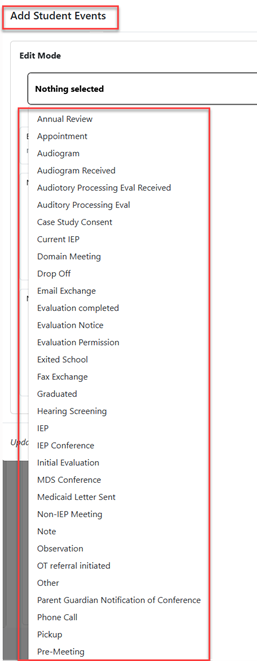
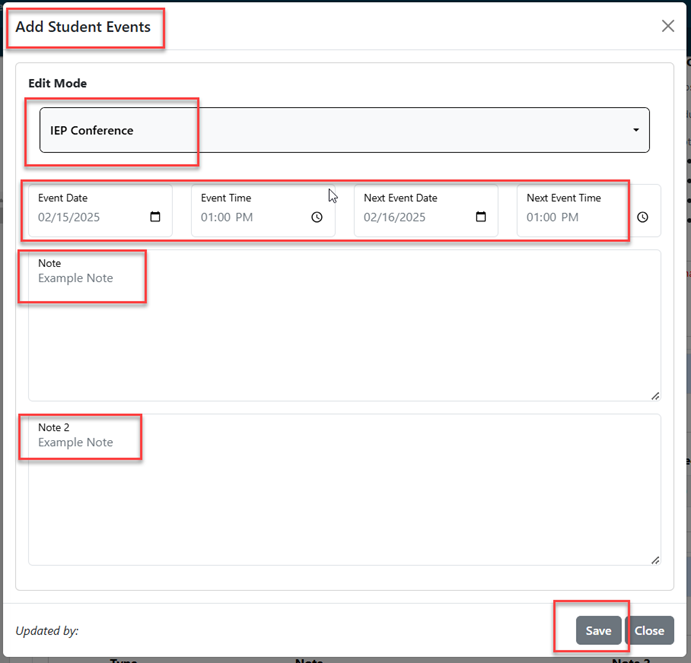
After choosing the note(s) that apply, two text boxes are available as well as event dates and event time dropdowns. Fill out the sections appropriately (if needed) and click save to complete.
After saving, the event will be displayed on the Student Approval View.

To add multiple events at once, click the + sign in the Events panel and click on all Events that should be added to the student's approval.
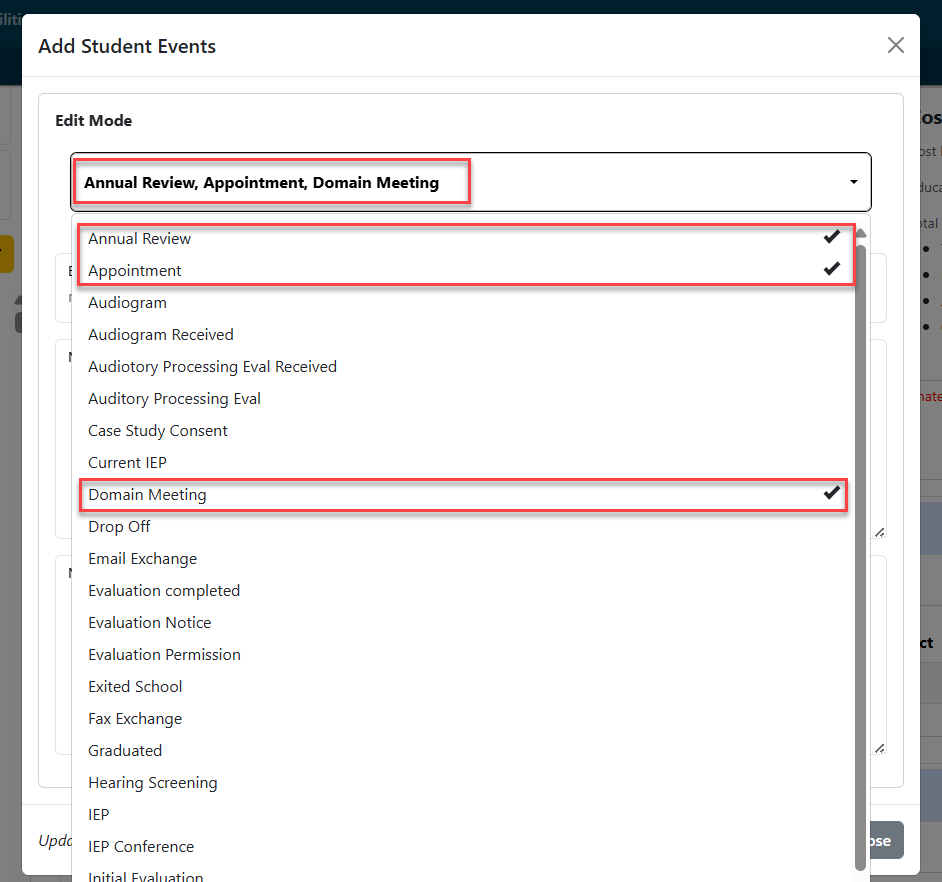
After selecting the necessary events, click anywhere on the popup box to return to the main edit screen.
Note: When creating multiple events at once, they will be created with the same date/notes.
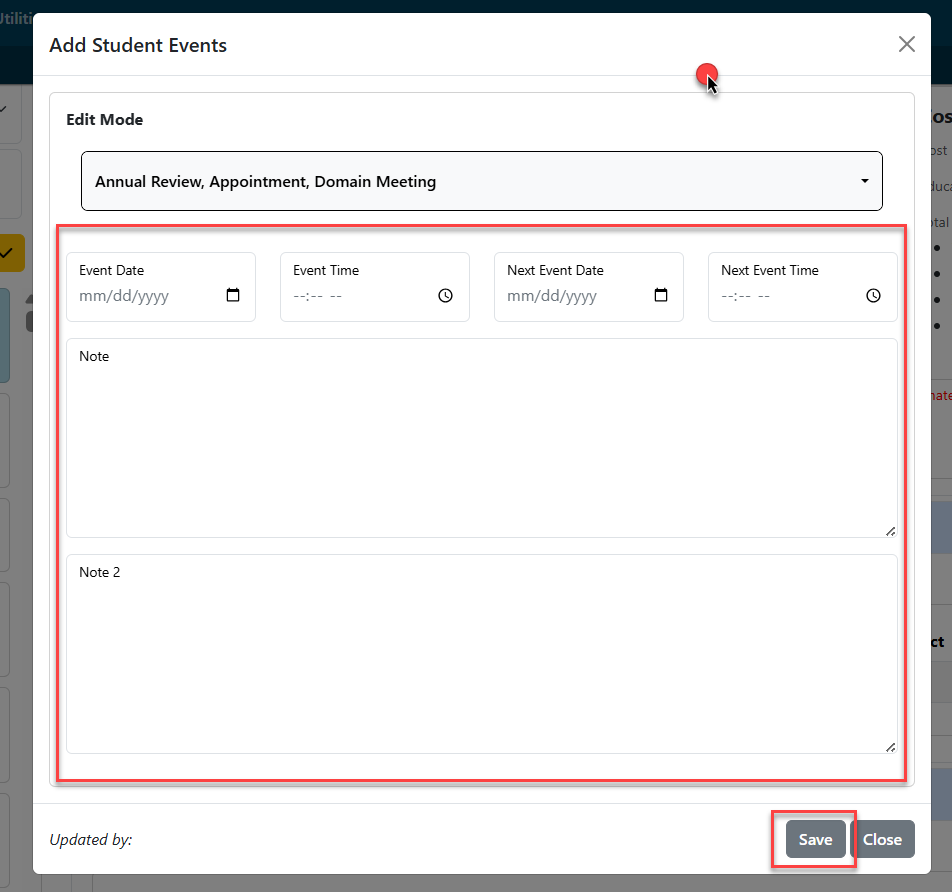
Once finished, click the save button.
To edit an event, click the edit icon.

Make the necessary edits and click the Save button once completed.
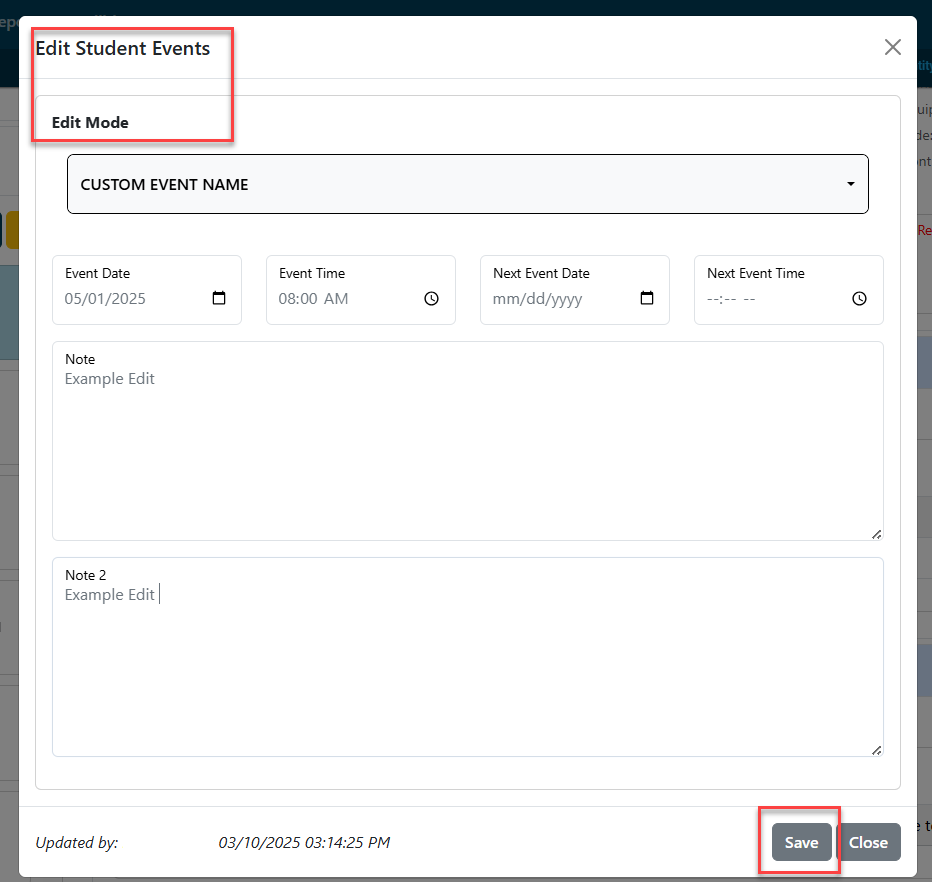
After clicking save, I-Star Plus will re-route users back to student central.