Notes: Difference between revisions
Jump to navigation
Jump to search
content |
No edit summary |
||
| (4 intermediate revisions by 2 users not shown) | |||
| Line 1: | Line 1: | ||
<center><small>(Navigate to [[Other Information|< Other Information]] | <b>[[I-Star Student User Guide]]</b> | [[Events|Events >]])</small></center> | |||
[[ | |||
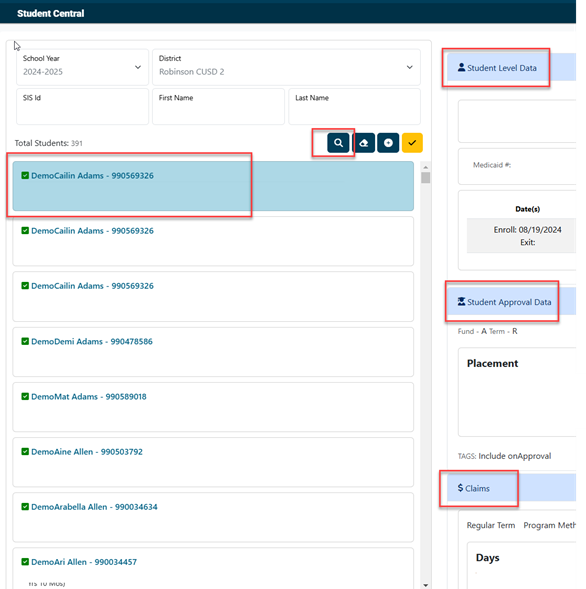
To enter additional data for the student’s profile, search for the student. | |||
Click the on the student’s approval record so that all student data displays on the right-hand side of your screen. | |||
[[File:Searchingastudent.png|none|thumb|589x589px]] | |||
<center><small>(Navigate to [[Other Information|< Other Information]] | <b>[[I-Star Student User Guide]]</b> | [[Events|Events >]])</small></center>Scroll to the bottom of the student pod to find the Notes/Events panel. | |||
[[File:Notesevents.png|none|thumb|646x646px]] | |||
[[File: | To add/edit notes, search for the student approval that required edits and scroll to the bottom to view the “Notes / Events” section. Click the + sign to add a new note. | ||
[[File:Addnote.png|none|thumb|975x975px]] | |||
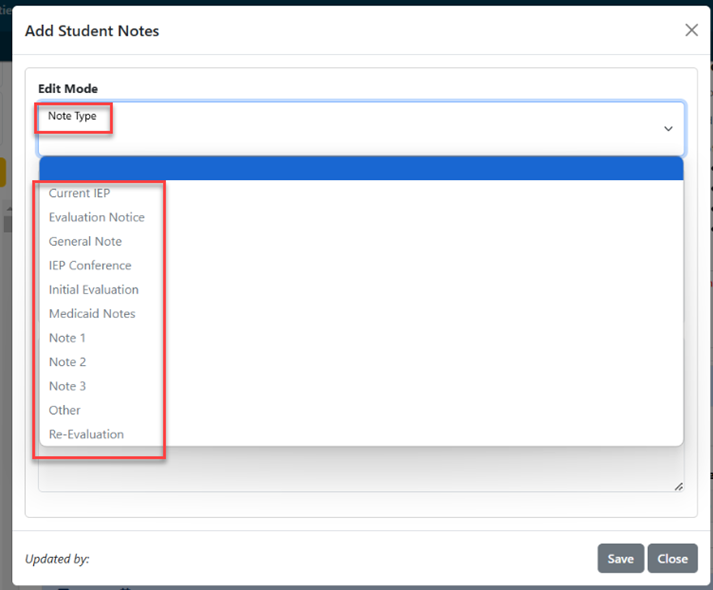
Click the ‘note type’ dropdown to select the type of note that needs to be entered. | |||
[[File:Editmode.png|none|thumb|713x713px]] | |||
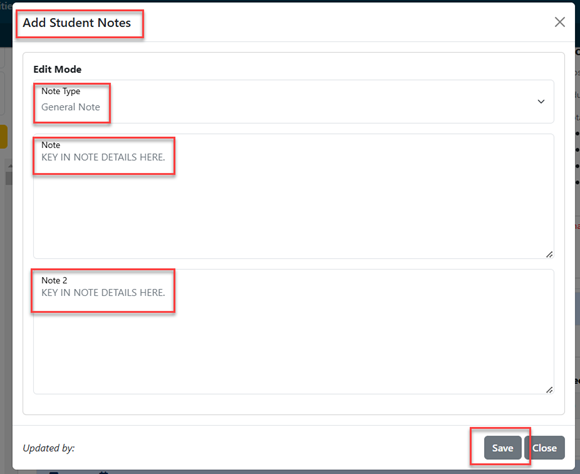
Once that fields are filled out appropriately, click save. | |||
[[File: | [[File:Clicksave.png|none|thumb|543x543px]] | ||
Users will be directed back to student central where the new note is visible. | |||
[[File:Newnotes.png|none|thumb|975x975px]] | |||
To edit an existing note, click the edit icon next to the note that requires an edit. | |||
[[File:Editanote.png|none|thumb|975x975px]] | |||
[[File: | |||
[[File: | |||
[[File: | |||
Latest revision as of 14:28, 29 January 2025
To enter additional data for the student’s profile, search for the student.
Click the on the student’s approval record so that all student data displays on the right-hand side of your screen.

Scroll to the bottom of the student pod to find the Notes/Events panel.

To add/edit notes, search for the student approval that required edits and scroll to the bottom to view the “Notes / Events” section. Click the + sign to add a new note.

Click the ‘note type’ dropdown to select the type of note that needs to be entered.

Once that fields are filled out appropriately, click save.

Users will be directed back to student central where the new note is visible.

To edit an existing note, click the edit icon next to the note that requires an edit.
