Case Load: Difference between revisions
No edit summary |
No edit summary |
||
| (9 intermediate revisions by 2 users not shown) | |||
| Line 1: | Line 1: | ||
<center><small>(Navigate to [[Case Load Definition|< Case Load Definition]] | <b>[[I-Star Student User Guide]]</b> | [[Case Load Import|Case Load Import >]])</small></center> | <center><small>(Navigate to [[Case Load Definition|< Case Load Definition]] | <b>[[I-Star Student User Guide]]</b> | [[Case Load Import|Case Load Import >]])</small></center> | ||
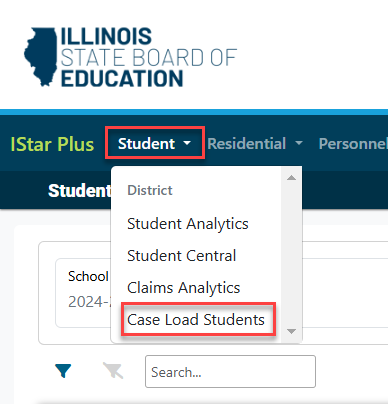
To enter Student Case Load data, click on Case Load Students from the Student dropdown. | |||
[[File:Enter caseload data.png|none|thumb|397x397px]] | |||
To search for caseloads to edit, fill in the dropdown filters and click the magnifying glass. | |||
[[File:Caseload filters.png|none|thumb|1468x1468px]] | |||
Click the | Click the checkbox to the left of the student that must be edited and click the edit caseload button. | ||
[[File:Edited selected caseload.png|none|thumb|1357x1357px]] | |||
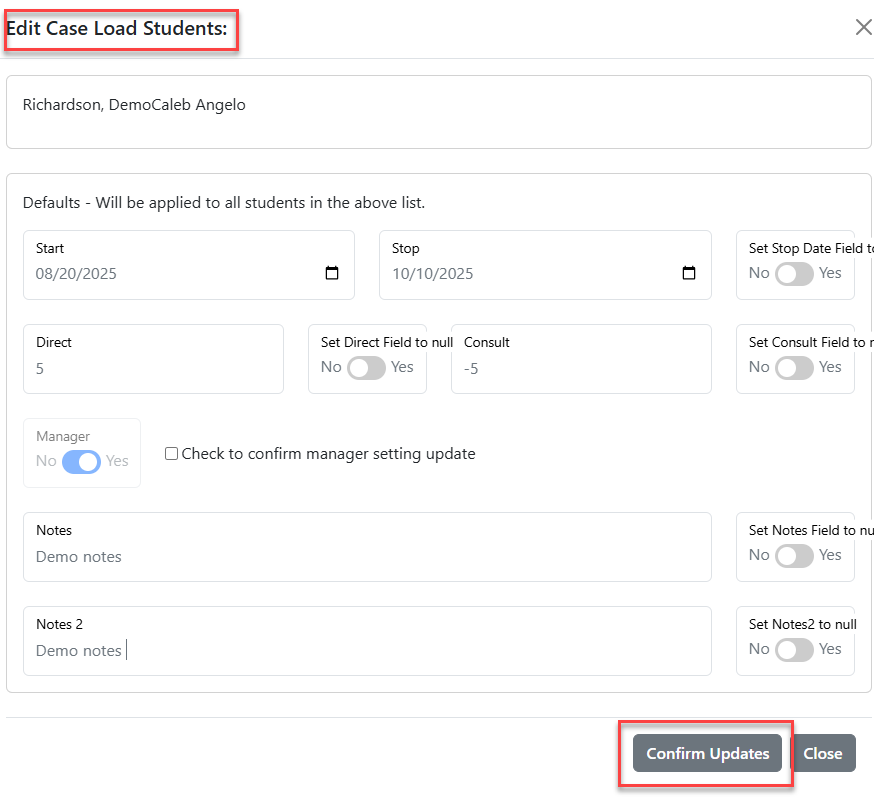
[[File: | Make edits as needed and click Confirm Updates once finished. | ||
[[File:Confrim update to casesload.png|none|thumb|557x557px]] | |||
To create an End/Add on an existing caseload, click the select checkbox next to the student's name and click the "Move or End/Add Selected Caseload" button. | |||
[[File:Endaddcaseload.png|none|thumb|1465x1465px]] | |||
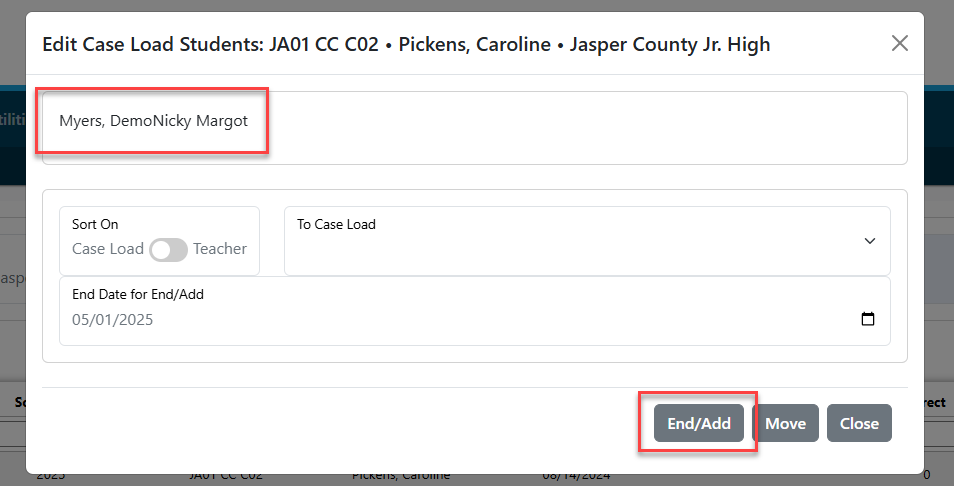
Click | Click End/Add. | ||
[[File:Enter the information to the edit caseload.png|none|thumb|872x872px]] | |||
To show all caseloads for one student, type in the search filters any identifying information and all available caseloads will populate. | |||
NOTE: Key in the end date and I-Star Plus will auto-fill the begin date on the new Caseload to the day after. | |||
[[File:Caseload end add.png|none|thumb|1619x1619px]] | |||
<center><small>(Navigate to [[Case Load Definition|< Case Load Definition]] | <b>[[I-Star Student User Guide]]</b> | [[Case Load Import|Case Load Import >]])</small></center> | |||
[[File: | |||
[[ | |||
Latest revision as of 12:30, 15 April 2025
To enter Student Case Load data, click on Case Load Students from the Student dropdown.

To search for caseloads to edit, fill in the dropdown filters and click the magnifying glass.

Click the checkbox to the left of the student that must be edited and click the edit caseload button.

Make edits as needed and click Confirm Updates once finished.

To create an End/Add on an existing caseload, click the select checkbox next to the student's name and click the "Move or End/Add Selected Caseload" button.

Click End/Add.

To show all caseloads for one student, type in the search filters any identifying information and all available caseloads will populate.
NOTE: Key in the end date and I-Star Plus will auto-fill the begin date on the new Caseload to the day after.
