Custom Notes: Difference between revisions
Jump to navigation
Jump to search
No edit summary |
No edit summary |
||
| Line 10: | Line 10: | ||
'''Step 3:''' Enter the new custom ''Note Type'' and click the '''Save''' button. | '''Step 3:''' Enter the new custom ''Note Type'' and click the '''Save''' button. | ||
[[File:Save Custom Note.png|alt=Save Custom Note|none|thumb|1010x1010px|Save Custom Note]] | [[File:Save Custom Note.png|alt=Save Custom Note|none|thumb|1010x1010px|Save Custom Note]] | ||
<center><small>(Navigate to [[Custom Events|< Custom Events]] | <b>[[I-Star Student User Guide]]</b> | [[I-Star Student Approval|I-Star Student Approval >]])</small></center> | |||
Revision as of 09:34, 11 August 2022
The Custom Events tab is where you can set up your custom events for the drop-downs on the Note Type section of the student's profile.
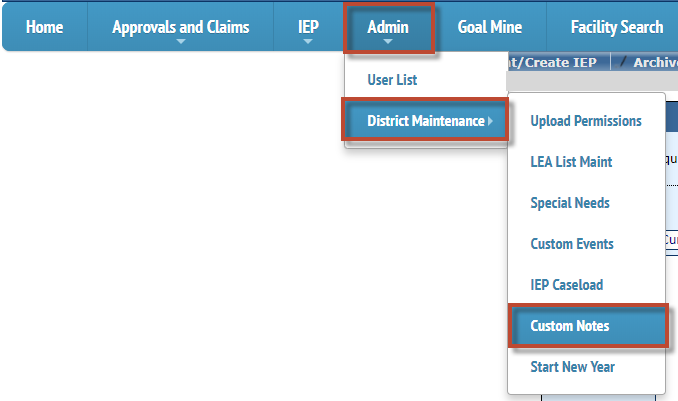
Step 1: To add a Custom Event from the Admin drop-down menu, click District Maintenance and Custom Notes.

Step 2: To add a new Note Type, click Add next to Custom Notes.

Step 3: Enter the new custom Note Type and click the Save button.
