Case Load Import: Difference between revisions
Jump to navigation
Jump to search
mNo edit summary |
add hyperlink |
||
| Line 6: | Line 6: | ||
Complete the search filters to open the desired ''Case Load'' to export. | Complete the search filters to open the desired [https://youtu.be/TKmtKX04CF8 ''Case Load'' to export]. | ||
Click '''Search.''' | Click '''Search.''' | ||
| Line 23: | Line 23: | ||
Open the Caseload.xls download file. Save it to your computer. Edit the file with any changes/additions. Save the file. | Open the Caseload.xls download file. Save it to your computer. Edit the file with any changes/additions. Save the file. | ||
NOTE: Do no delete any columns. The format must remain in tact to import back into I-Star. | NOTE: <u>Do no delete any columns</u>. The format must remain in tact to import back into I-Star. | ||
Click '''Choose File'''. Browse computer and locate the .xls file to import. Click '''Open'''. | Click '''Choose File'''. Browse computer and locate the .xls file to import. Click '''Open'''. | ||
Latest revision as of 10:03, 9 September 2022
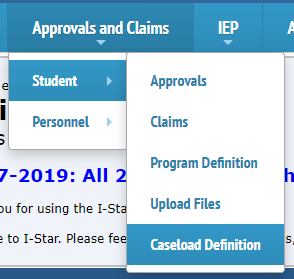
From the Approvals and Claims drop-down menu, select Student and select Case Load Definition tab.

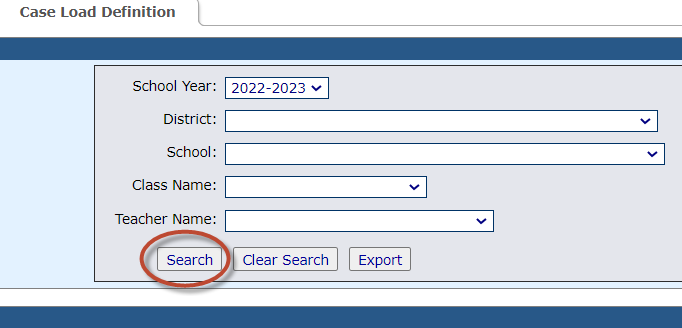
Complete the search filters to open the desired Case Load to export.
Click Search.

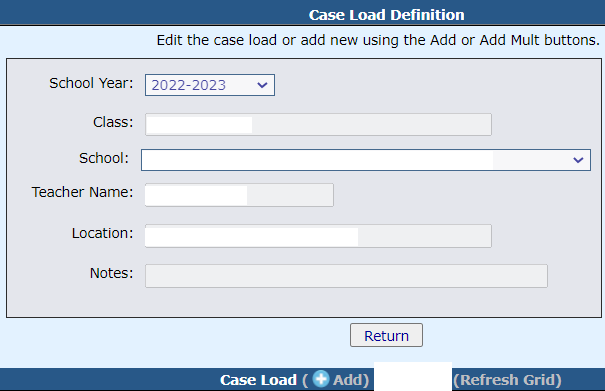
Click on the Case Load icon in the search results grid.

Click Export.

Open the Caseload.xls download file. Save it to your computer. Edit the file with any changes/additions. Save the file.
NOTE: Do no delete any columns. The format must remain in tact to import back into I-Star.
Click Choose File. Browse computer and locate the .xls file to import. Click Open.
Click Import File.

Click Refresh Grid to view import changes.
